Clearing Veggie Bed #1…

This morning before I started on my freelance work. I started clearing Veggie Bed #1.

I first cut down the String Beans that were done producing. I found a lot of old pods that we didn’t harvest, but I’ll dry them and either us it for another planting, of use it for soup or another dish that calls for beans.

Old Beans Clearing Veggie Bed #1

I then removed the trellis and hack away at the old Tomato plants. I harvested all the fruits that were left. The Roma type below is a variety called ‘Mamacita’. I think the round ones are ‘Rutgers Select’.

Last Tomatoes from Veggie Bed #1

I then cleared away two Eggplant plants that didn’t produce for us. I keep forgetting that Eggplants don’t do well for me, but I end up buying a couple plants in the spring hoping my luck would change. That didn’t happen this year :P

I then evened out the soil and collected the wood bark mulch. I then removed all the old SFG dividers that were either warped or have disintegrated… replacing them with the PVC divider from my last entry.

SFG with PVC Dividers

It’s almost ready for fall/winter planting!!!

PVC DIY Projects…

Yesterday, Me and my Mom went to Home Depot to get some narrow cement hollow blocks to make a narrow garden bed along our north fence. Something my Mom has been asking me to build/fix.

I also decided to get some PVC pipes and connectors to build a cold frame that I want to put over Veggie Bed #2 to protect a Pomelo tree and extend my Peppers growing season, since it’s starting to get cold. I quickly drew a sketch for the cold frame and figured out what supplies I needed.

As I was gathering the PVC pipes and connectors, I had another idea to make dividers for my SFG (Square Foot Garden). So I got more connectors and pipes and somehow got all of these to fit in my Honda Civic Coupe… Note that those PVC pipes were 10 foot tall!

Once home, I started to assemble the cold frame, but it started too look like my plan wasn’t going to work, since I couldn’t bend the pipes as much as I could. So I sketched another plan and decided to leave this project for tomorrow when I can get more connectors and pipes.

Mini-Greenhouse/Cold Frame Plan

So I put my cold frame plans aside and built out the SFG dividers. I figure out to cut the pipes into 10.25 inch length. When I add the connectors to it, it comes out to about 12 inches center to center, which is the right size.

This morning I cleared out Veggie Bed #1 and placed the SFG dividers. Here’s how it looked like:

SFG with PVC Dividers

Not bad. I was really happy with it. This will definitely last longer than my other failed attempts using nylon rope (which disintegrated after a season), dowels (which warped and just got old) and wire (which was hard to see).

Peas

I haven’t been gardening lately, but I needed to plant the Peas that I sowed about a week and a half ago, before they start getting all tangled up in their six pack containers… so I started digging up part of the soil in my third veggie bed and amended it with potting mix and manure.

Planting Snow Peas

I was planning to build up the walls to this third bed, but haven’t had the chance to, so I temporarily place two layers of scalloped bricks until I can mortar the walls… which won’t be until maybe next spring.

As I was digging up the soil, I found some Garlic that I planted in the Fall of 2004. I thought they all rotted and died because they hardly had any foliage. I recorded this on June 15, 2005. Apparently, they survived.

Found Garlic

Since they are small, I think I will replant them.

More Gardening (Yesterday)

Sunday, July 9, 2006

I was able to catch up on some repotting today. I repotted the Arguta Kiwi (female), White Genoa Fig, Forsythia and some Taros into larger one gallon containers.

Potted Forsythia   Potted Kiwi, Fig and Taro

I also repotted my Pink Echeveria, and discovered that the grower didn’t even remove the plastic basket it was originally grown in. I had to cut the basket into pieces so I wouldn’t damage its roots and the baby plants. Here’s the before and after photos.

Pink Echeveria   Pink Echeveria

Here’s a photo of the vegetable bed I been working on.

Vegetable Bed with Trellises

And finally, as I was done with most of my gardening chores, I got a bag a potato chips and Calli kept chasing me around the garden trying to get some. I gave her a few, but ened up giving her some doggie snacks. Here she is one the other side of the vegetable bed.

Calli Wants Potato Chips

A Lot of Gardening Be Done…

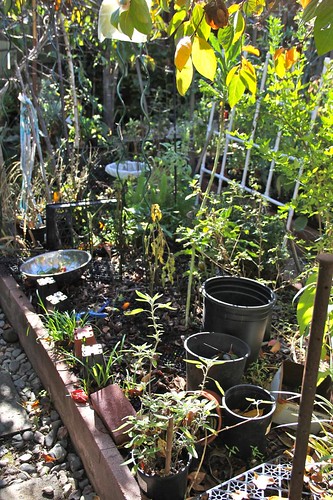
I was pritty much out in the garden from about 1-9pm, with an exception of about an hour nap. I got caught up in a lot of gardening tasks.

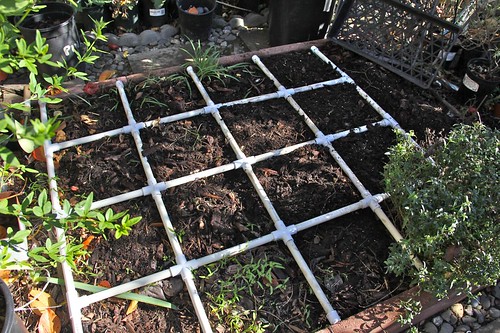
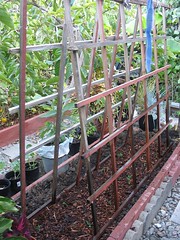
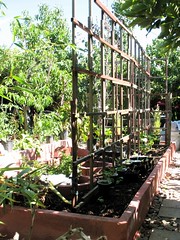
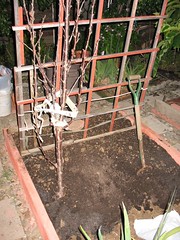
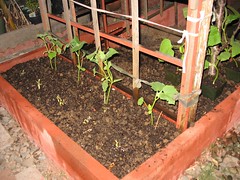
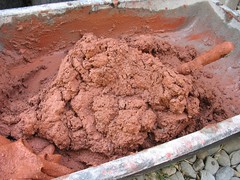
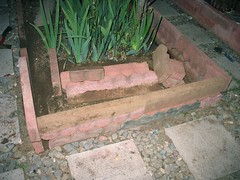
I added more amendments to the veggie bed I’ve been working on. I have more than three quarters filled. The other quarter still has Chocolate Mint, some Columbines, and Hyacinth bulbs which I still have to dig up. I may just leave it like this for now. I added two more trellises and transplanted (more) Lemon Cucumbers, Sikkim Cucumbers and Smooth Beauty Luffas.

There’s a short Calamasi tree in the middle of the bed, which isn’t doing well. My Mom says that we have never gotten any Calamansi to grow well in the back, so she was open to pulling it out and planting it in a 5 gallon or bigger pot. I’m still not sure if I will pull it or not.

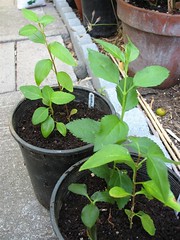
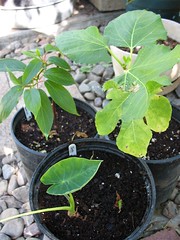
I planted two Pineapples that were rooting in water into small pots. I now have a total of three Pineapple plants.

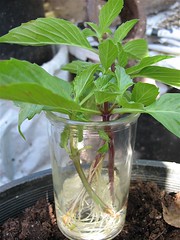
I also potted some Thai Basil that was leftover from a Pho lunch at a Vietnamese restaurant. It really sprouted a lot of roots in water.

Thai Basil   Thai Basil Roots

I dead headed a lot of the flowers in front as well as collecting some Columbine seeds. Some of my Coleus are starting to bloom, so I removed the blooms so they can focus on growing more.

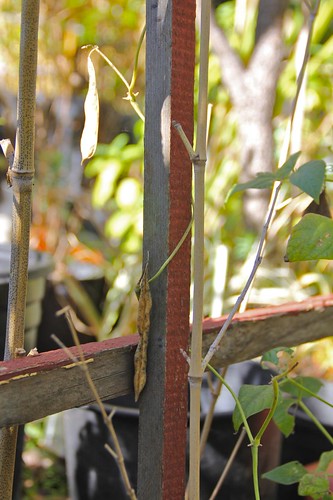
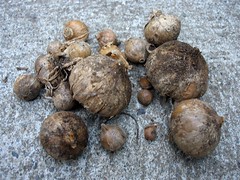
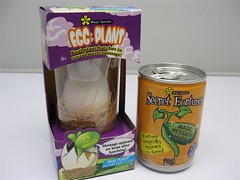
I also remembered that I bought two of those Message Bean thingies back in December and set them up following directions. After about an hour, I was so curious to see what kind of seeds they were, so dug them out. They were huge beans that I didn’t recognize. Instead of planting them in the little containers they came in I potted them up in drinking cups with potting soil.

Magic Sproutz Egg Plant and Secret Fortune   Message Beans

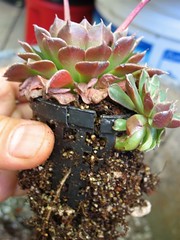
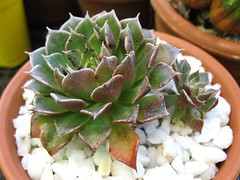
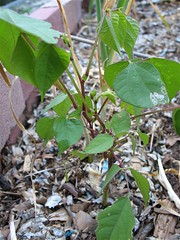
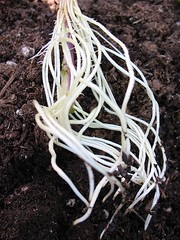
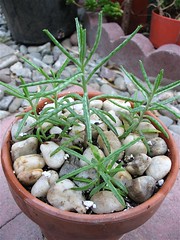
I potted up the Kalanchoe tubiflora that grew from leaflets ( photo ) I found into a terra cotta pot.

Potted Kalanchoe Tubiflora

I also transplanted two Pines that I grew from collected seeds into one gallon containers. These are my future Christmas trees. (see my next journal entry for photos)

My brother got a total of three pallets of damaged potting soil, mulch, etc. bags from Home Depot. Each pallet contains about 10 bags for a little over $5. I can’t remember how many pallets he said has gotten so far. He also go a garden gate on clearance from Target.

Amending and Planting in the Newly Prepared Veggie Bed

Wednesday, July 5, 2006

After the mortared veggie bed has dried, I started breaking up the hard clay soil and added compost, steer manure, soil conditioner, potting soil and fertilizer to about a third of the bed. I didn’t have time to do the whole bed, since I had to dig up some Bearded Iris that hasn’t been divided in I-don’t-know-how-many years.

This is the clay I had to break up

Before Adding Soil

Here’s a third of the bed after amending it. I didn’t finish until about 9pm; that’s why the photo looks dark.

1/3 Filled with Soil

Thursday, July 6, 2006

I staked in a trellis and planted Lemon Cucumber and Swiss Chard in the newly prepared veggie bed. Again, I didn’t finish until about 9pm; that’s why the photo looks dark.

Cucumbers

My back and muscles now are sore!

A Day of Mortaring…

I’ve been taking a little vacation from my gardening journal, but I still have been gardening and buying plants (I can’t help it).

I also have been setting up my Veggie Bed #2 for mortaring, which after procrastinating, finally mortared today.

Red Mortar   Mortared Brick Wall

A couple days ago, as I was rearranging the brick, I took this photo of the overgrown Chocolate Mint in the bed.

Spreading Chocolate Mint

The Start of Veggie Bed #2

When I got home from I went to check if the fly I took a photo of yesterday was still there. Instead I found this ladybug. This Coleus must be a popular bug hangout!

Ladybug on Coleus

I was surprised that a Bataw (Filipino name for edible Hyacinth Bean) plant that we planted last year survived the winter and is growing again! My Mom placed a bottomless soda bottle over it to act as a cloche. These are supposed to be annuals.

Bataw Survivor

Finally, This evening I started work on building up the walls to my second vegetable bed. The walls are made of two levels of scallop bricks which I have to stack scallop to scallop. For stronger support, I have to make sure the ends of each brick are staggered. The tricky part is constructing the corners. I only got one end semi-done because it was getting dark.

Starting to Fix Veggie Bed #2

Here’s a photoset of what I did last year with the first vegetable bed.