Lacto-Fermented Green Beans

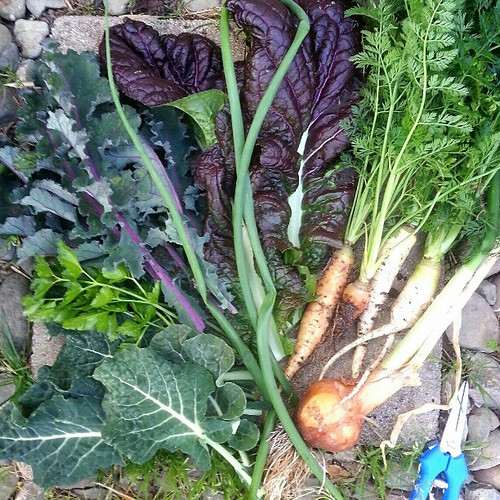
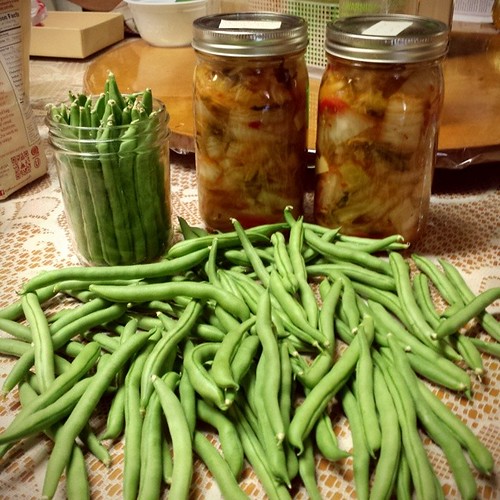
About a week ago, my Aunts and Uncle gave us a bunch of homegrown Green Beans that they just harvested. Since only two of us in our household can eat beans, I wondered if I can pickle some. I haven’t seen Lacto-Fermented Beans sold in any store, so I didn’t know if Beans made good Pickles. This is how I made it…

My Aunts and Uncle grew these Green Beans and gave us some... so I gave them some Kimchikraut.

I washed the Green Beans and cut the top tips off. I blanched them in boiling water for only 2 minutes, then immediately drained the hot water and placed the Beans in a cold water bath to stop the cooking process.

While the beans cooled off, I made a brine by dissolving 2 tablespoons Sea Salt into 1 quart Water (bottled or filtered)… and set this aside.

To the bottom of a quart mason jar, I added the following:
– 1 or 2 Bay Leaves (or you can use a Grape leaf) These help keep the pickled vegetable stay crisp.
– 1/2 teaspoon Peppercorns
– 1/8 teaspoon Caraway
– 1/8 teaspoon Fennel Seeds
– 3 cloves of Garlic cut into halves

You can use whatever herbs and spices you like. Dill would be perfect, but we didn’t have any (my Dill plants are still small). Chili Flakes, Mustard Seeds and Coriander would be good too.

I stuffed as many Green Beans that will fit into the jar and then a few more. You want them crammed in the jar so they don’t float up once the brine is poured in.

I have glass weights (Crock Rocks) made specially for pickling that goes over the vegetable to keep them submerged in the brine. If you don’t have these, you can use a shot glass, or a small 4oz canning jar, or a cabbage leaf… anything to keep the vegetable submerged in the brine.

Pour in the brine until it’s about an inch from the top of the jar. I then sealed the quart mason jar with a pickling lid (Kraut Kaps) and set it aside to ferment at room temperature for 5 to 10 days.

Making lacto-fermented Green Beans and Lunar White Carrots.

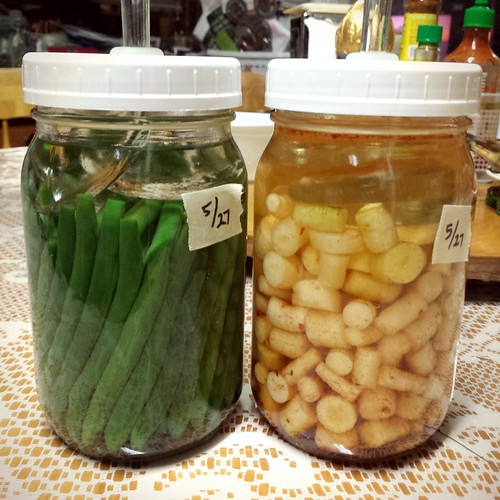
After about 8 days, I tried the Lacto-Fermented Green Beans and they were perfect… and sooooo good!

These Lacto-Fermented Green Beans

Store the Pickles in the refrigerator.

March 2013 Harvest Day

Today’s harvest (for March Harvest Day):
Dinosaur Kale
Flat Leaf Parsley
Green Onion
Red Russian Kale
Red Giant Mustard
Blend of Colors Carrots
Walla Walla Onion

Today's harvest (for March Harvest Day)

It’s been a long time since I harvested Carrots. They took a long time to grow and there wasn’t many, but you don’t find much white and yellow Carrots at the grocery.

Harvested Carrots

I want to grow more of the non-orange ones, especially the purple ones.

Chopped Carrots

I made a Pizza (or Tart) using only vegetables that I harvested…

Pizza/Tart

and had so much vegetables left over that I made, so I also made a Veggie Frittata.

Veggie Frittata

Induction Cooktop Query…

Does anyone use or have used an Induction Cooktop… like a NuWave Induction Cooktop, this one by Duxtop ( link to Amazon ) or something similar?… I was just curious how well they worked and if they are as good as the commercials makes them look. Thanks.

4 Squares Planted + Big Greens Harvest…

I did a bit of gardening today, since the weather’s finally cleared up. It’s been raining for the past few days and parts of the garden are slightly flooded, but most of the garden got a good dose of water, which is good. I placed out a bunch of empty buckets and plastic storage boxes and collected as much water as I can get. Our rain barrel was filled to capacity and my Mom placed an empty trash can under the rain spout in back for the garage, but we found out today that it had a hole at the bottom. :(

Our Red Giant Mustard are still growing, but they probably just have about 2 more harvests left before bolting… so I want to keep the Mustard as well as some Kale and Mizuna coming. I planted 4 squares (4 plants each) in the Square Foot Garden today:
Mustard ‘Florida Broadleaf’
Mizuna (Red Leafed)
Kale ‘Rainbow’
Mustard ‘Red Crimson’

I then went around the garden and picked a bunch of greens!!!… Mostly from the front yard, but also got some Kale from the back. The greens include: Collards, Curly Leaf Kale, Dwarf Blue Curled Kale, Red Russian Kale, Redbor (G2) Kale, Kailaan, Broccoli Raab, Bright Lights Swiss Chard and Beet greens.

Lots of harvested Greens: Collards, various Kales, Gailaan, Broccoli Raab, Swiss Chard and Beet Greens

Click the photo above to see the annotations on Flickr.

Harvested Broccoli Raab and Bright Lights Swiss Chard

I chopped then up and sautéed them with Onions, Garlic and olive Oil with a touch of Chicken Stock, Salt and Pepper… and they turned out so good!

Sautéed Homegrown Mixed Greens (and Yellows and Reds)

What’s Joey Eating?…

Last night, I was laying in bed and an idea popped into my head. I want to take daily photos of what I eat… but I want keep the photos separate from my main Flickr or Twitter account… so I searched for an iPhone app that I can use for this purpose and I found one called Eatwit.

Eatwit is an iPhone app that allows you to record what you eat and take a photo(s) and include information like a description, rating, fullness, calories, bill and location. Then you can post that to Twitter or Facebook. I also created a new Twitter account: joeyseating that I will use specifically for this purpose. One thing I like about this app is that the images are posted to a separate server so I don’t have to store it on my Instagram or Flickr account… I can just look it up on Twitter.

I’ll see how I like this… I may change my mind later and use another photo app that is more Instagram-like… be we’ll see…

Update: I changed my strategy… Instead of using Eatwit, I will now using Instaplus which has photo effects like Instragram. I can either snap a photo directly with Instaplus or load it from my camera library. After making adjustments, I can send it back to the camera library then use the iPhone’s built-in Twitter integration to send the photo to Twitter.

What's Joey Eating?

I like this approach better because the photos are higher resolution (compared to Eatwit, which downsizes the photos) and the photos are also better intergrated with Twitter. You can easily view the photo without going to a separate site and you can see a thumbnail of it under “recent images” on the sidebar. The process handles the image storage and stores the images to Photobucket.

What can I say… I’m a geek!

Homemade Apple & Pear Sauce + Cinnamon Apple & Pear Filled Pastry…

I never posted photos of the Apple & Pear Sauce which I made back in September 2011… So here they are.

Unknown Apple Variety

I harvested a bunch of Apples and Pears from our garden. We have a bunch of trees, so I just take a couple here and a couple there for a mixture of different Apples, Pears and Asian Pears.

Various Apple & Pear Harvested

Just dump them into the sink and wash them in a pool of water.

Washing Apples & Pears

Skin them… You can leave the skins on, but I like the Apple and Pear sauce without the skins. Chop them up into pieces.

Apples & Pears Skinned and Chopped Up

Place the sliced Apples and Pears into a big pot with about a teaspoon of cinnamon and some sugar. I usually put about a quarter to a third of the amount that the recipe calls for because my Mom doesn’t like it too sweet. You can also add a little bit of lemon or use honey instead of sugar… You can find various recipes online.

Ready to Make Apple & Pear Sauce

Set the stove between medium and high until the Apples and Pears soften and releases its liquid (I don’t even add water). Once it starts to bubble, reduce the heat to low… then just continue to mix, mash and cook it down until it’s a consistency that you like. I like a little bit of fruit chunks, so I don’t cook it too long. It will get darker as you cook it more.

Reduced Apple & Pear Sauce

Once done, I place them in prepared canning bottles and boil the bottles according to the canning instructions. Once cooled, these should last for a while.

Bottled Apple & Pear Sauce

We have ours stored in the pantry and sometimes when I feel like making a simple and quick pastry, I’ll open a bottle and fill biscuit dough (from those refrigerated tubes) with about a teaspoon of sauce. Fold the edge together to enclose the filling and crimp the edges.

Filling Dough with Apple & Pear Sauce

Then roll the dough in cinnamon sugar and bake. Eat while warm because once they cool down, the pastry may get soggy.

Cinnamon Sugar Apple & Pear Sauce Filled Pastry

More Dirt Pot Plantings + Tatsoi & Purple Bok Choy Harvest…

I continued planting more Dirt Pots with veggies for the front yard, but first, I finished the Spinach and Elephant Garlic Dirt Pot (that I started yesterday) by adding bark mulch.

Spinach 'Bonnie' and Elephant Garlic

I planted two more Dirt Pots. One with Red Russian Kale and one with Rainbow Swiss Chard that I had left over from late last year’s planting. When I planted the Swiss Chard last year, there were so many seedlings in the cell pack. I only planted the biggest plants, divided the smaller ones left over and planted them into larger cell-packs, hoping they would grow… and luckily they did.

Pak Choi 'Purple Choi'

At the end of the day, I harvested the Gai Choy (photo below) and Purple Bok Choy (photo above) that were both starting to bolt. I have a feeling that the Gai Choi seeds I got were packaged wrong, because this actually looks like Tatsoi. I’ll do another planting and see what I get.

Gai Choi or Tatsoi

In any case, it still makes a good harvest. I saw a YouTube video where this woman made a Korean Spinach side dish, called Sigeumchi Namul. I made this substituting the Tatsoi and Purple Bok Choy for the Spinach.

Sesame Seasoned Tatsoi and Purple Bok Choy

I also saw another YouTube video of a rice substitute/side dish called Cauliflower Rice. It’s so simple to make. Ingredients is just Cauliflower, salt and pepper.

Cauliflower Rice

Apples, Pears and Asian Pears…

Apple and Pear Crisp

I harvest various Apples, Pears and Asian Pears from our garden to make an Apple and Pear Crisp.

Harvested Apples, Pears and Asian Pears

I harvested the two Asian Pear ‘Hosui’ Folia fruits because they were starting to soften. I think I should have harvested them a few weeks ago when they were more firm.

Asian Pear 'Hosui' vs Other Asian Pear

The Asian Pear ‘Hosui’ fruits are more brown and spotted than our existing Asian Pear (unknown variety) Folia that they are grafted onto.

One of our Apple variety has splotches of semi-translucent areas inside the fruit. It looks mushy, but isn’t. My Mom says that this is normal and it tastes a little like Pineapple.

Unknown Apple Variety

I didn’t remember to take a photo of the unpeeled Apple. I’ll have to check the tree and take a photo.

Anyone happen to know this Apple variety?